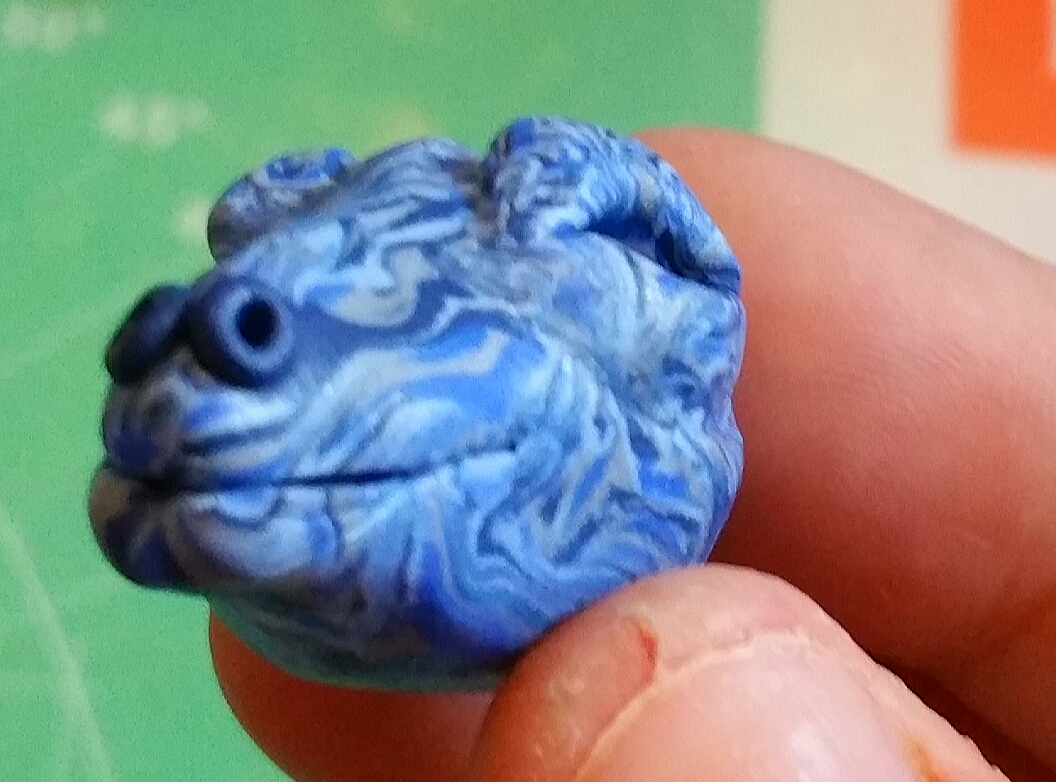
One of the most pervasive myths about polymer clay, is that it is poisonous. I am telling you now that it is not.
How this myth got started
I have heard that it was spread around by the first generation of polymer clay artists, because they saw that the clay was so perfect that the market could very easily get flooded with competition.
There is no actual proof of this that I have seen and even if it is true, they where not successful. There are tones of excellent artists selling their creations.
I think it is more likely that it was a combination of the fact that it is a plastic and the fact that responsible sellers say ( like I do in my literature) that their clay products are not to be in contact with food or drink. When you put clay on the outside of glass or ceramic, it's OK. Here is why we say this;
If you put baked clay under a microscope, you will find it has a pitted surface. This means that it is hard to get the surface germ free. See porous, not poisonous.
But what about the fumes when you bake it?
While it does omit a slight chemical smell while baking, fumes is really far too dramatic a word.
If you chose to spend the whole day huffing them, you would have no effect other than waisted time. If you don't like the smell in your oven, simply cover the tray with foil.
Certified safe for children
Above is a pack of Fimo. If you look in the bottom left corner, you will see the symbol below.
The AP (Approved Product) Seal
This identifies art materials that are safe and that are certified in a toxicological evaluation by a medical expert to contain no materials in sufficient quantities to be toxic or injurious to humans, including children, or to cause acute or chronic health problems. Such products are certified by ACMI to be labeled in accordance with the chronic hazard labeling standard, ASTM D 4236, and the U. S. Labeling of Hazardous Art Materials Act (LHAMA).
And finally....
The last bit that should convince you. I have eaten Fimo myself and I am fine.
I do my clay work from my bed and I also have a snack supply (some healthy and some naughty). I have lost count of the amount of times that I dropped a bit of chocolate and found brown clay. I know my mistake only by the fact that it basically is tasteless.
So let your kids loose on some Fimo. You will then get to treasure their creativity forever.
Visit My Etsy Shop
Search This Blog
Showing posts with label modelling. Show all posts
Monday, 17 October 2016
Tuesday, 27 September 2016
Lots of cat cuddles
As I have mentioned before, I look through animal pictures on Google to get most of my inspiration.
A few months into the business, I came across my most used picture. I was looking under the search term "cute animals" and amongst them was this picture of a really cute black and white pair of cats cuddling. I will share the link rather than the picture as I don't want to infringe anyone'scopywrite.
http://www.redbarninc.com/blog/wp-content/uploads/2015/11/black-cats-cuddle-cute-heart-Favim.com-418491.jpg
Well you see what I mean, it screams "you must put me on lots of boxes! I am definitely the cutest protrail of cats you will ever find ".
With an argument like that, how could I refuse?
At verious points, I have made my version of this. I have also done it with different types of cats. Mabe one day I will do it with the wild cats too.
Some have found their forever homes and some are waiting hopefullin my shop, but whatever happens they are never alone.
A few months into the business, I came across my most used picture. I was looking under the search term "cute animals" and amongst them was this picture of a really cute black and white pair of cats cuddling. I will share the link rather than the picture as I don't want to infringe anyone'scopywrite.
http://www.redbarninc.com/blog/wp-content/uploads/2015/11/black-cats-cuddle-cute-heart-Favim.com-418491.jpg
With an argument like that, how could I refuse?
At verious points, I have made my version of this. I have also done it with different types of cats. Mabe one day I will do it with the wild cats too.
Some have found their forever homes and some are waiting hopefullin my shop, but whatever happens they are never alone.
As a identical twin, I dislike my own company. So, spending forever in a loving cuddle sounds great to me.
I also volunteeras a cat behaviouralist (I have studied feline behaviour and psychology), so these boxes are probably the closest to my heart.
I think I will be making variations for the rest of my career. I will never make a mould though, I love freehand sculpting too much.
Sunday, 25 September 2016
My dragon's first ever cousin and I could not be more proud!
As all who follow my blog know, yesterday I posted my first ever tutorial (other than the page showing my swerly parren). I posted it on various polymer clay groups, fantasy groups and dragon groups, only really expecting a couple of likes.
This morning however, I saw that someone hadactually commented 😲
It was a lovely woman called Jamie (a complete stranger). She said that she could not sleep last night, so she decided to follow my tutorial with some scrap clay.
She had never made a dragon before and had found that when other people had posted illiterated tutorials, they where difficult to follow, but she didn't find that to be the case with mine.
Here he is! It's not the greatest photo, but it's good enough to see that it's a truly fabulous little fellow, especially since his mum was tired and doing this for the first time. I assure you that he is far superior to my first.
I asked her if there was any part of the tutorial that she thought I needed to change in any way and she said no.
I was so happy that I actually cried a little and I am not a crying kind of girl! One of my big dreams/ ambitions, is to become a polymer clay tutor. There are a fair few out there, but most teach you how to make jewellery, beads, replica food and model babies and canes.
I want to teach model making and home decor items such as my boxes and bowels. I am too ill at the moment to do this, but I am slowly working on writing up some lessons and handouts.
I have even got (through much scrimping and saving) all the kit required for 8 people plus me. As soon as I stop shaking (it's been happening for over a week and is really annoying, I am having to adapt my clay techniques to cope with it) I will be filming my first YouTube tutorial.
So, unbeknown to the lovely Jamie, when she decided to combat the boredom of insomnia. She had actually validated all of my dreams and hard (usually painful) work. I'm not delusional, I can actually teach 🎆😆🎉
This morning however, I saw that someone hadactually commented 😲
It was a lovely woman called Jamie (a complete stranger). She said that she could not sleep last night, so she decided to follow my tutorial with some scrap clay.
She had never made a dragon before and had found that when other people had posted illiterated tutorials, they where difficult to follow, but she didn't find that to be the case with mine.
Here he is! It's not the greatest photo, but it's good enough to see that it's a truly fabulous little fellow, especially since his mum was tired and doing this for the first time. I assure you that he is far superior to my first.
I asked her if there was any part of the tutorial that she thought I needed to change in any way and she said no.
I was so happy that I actually cried a little and I am not a crying kind of girl! One of my big dreams/ ambitions, is to become a polymer clay tutor. There are a fair few out there, but most teach you how to make jewellery, beads, replica food and model babies and canes.
I want to teach model making and home decor items such as my boxes and bowels. I am too ill at the moment to do this, but I am slowly working on writing up some lessons and handouts.
I have even got (through much scrimping and saving) all the kit required for 8 people plus me. As soon as I stop shaking (it's been happening for over a week and is really annoying, I am having to adapt my clay techniques to cope with it) I will be filming my first YouTube tutorial.
So, unbeknown to the lovely Jamie, when she decided to combat the boredom of insomnia. She had actually validated all of my dreams and hard (usually painful) work. I'm not delusional, I can actually teach 🎆😆🎉
Saturday, 24 September 2016
How I make my dragons in 30 steps. Fimo / Polymer clay tutorial
Today I am going to show you how to make this lovely blue dragon. I have used my swerly clay pattern that I show you how to achieve here How to make swerly patterned clay
You will need:
- 2 different coloured clay (Fimo/polymer clay)
- 2 crystal beads for eyes and any crystals you are going to have it hold or mounted in its head.
- Some florists wire and something to cut it
- A pin or pin tool
- A rounded tool for smoothing and making the eye socket.
Method
1) Roll out a ball of clay, making sure that you have it smooth. Then, one Side you roll between your fingers and pull out into the tail. Using the same technique, pull out a thicker and stumpyer bit for the neck as shown in the above picture.
2) Putting the body to one side, we are going to make the legs. The top 2 are the arms and they are in the position to hold something.
Make sure you start out with 4 smooth balls the same size. Then you use the same technique as with the neck and tail, to pull the clay out into a long cone shape. You then manipulate it into the right shapes as pictured.
3) Very easy. Get the body and press it firmly onto it's base. Remember, the base needs to be able to go though an oven baking without melting.
Pinch along the back to create a spine.
4) Using your contrasting colour, you are going to roll out 12 tiny claws, like in the pipicture above.
5) Push the back legs onto the body and get the feet into a position you like, then make sure they are secure.
Then add 3 claws onto each feet.
6) If you are planning on having your dragon hold anything, then add this to the front and push it against the chest to start to secure it in place.
7) Add the front arms. Make sure you press them to the body, so they are firmly attached. You then position the arms and paws where you want. Make sure that they are firmly stuck to the base and the crystal, as you want the crystal to be very secure.
9) It's time for the tail to get some TLC. Position it how you like (I often bring it round the back legs ), remember that if you have it lifted off the ground, it is far more likely to break while baking.
I advise you insert an extra bit of florists wire to strengthen it. Don't forget to cover up and smooth off the resulting hole in the tip.
I decided to add a spiral in the contrast colour. Make a small sausage and press it flat, then twist it with your fingers.
10) Put the body to one side as we are going to make it's head.
Roll out a smooth ball, then roll on side of the ball to make a kind of pear shape (like in the picture).
11) Using a ball tool, uo make eye sockets on both sides.
Remember that predatorshave their eyes to the front and prey have their eyes to the sides.
12) If you are using crystals for eyes, place a bit of baking foil in each of the backs of the eye sockets (shiny side out) and smooth it in place with the ball tool.
If you are using a ball of clay or something not reflective, don't bother with this. It will make your crystals sparkle.
I like to use coloured Swarovski crystals.
13) Add your eyes to each eye socket.
14 ) Putting the head to one side, we are going to make eyelids.
You want a small sausage tapered at both ends, for the bottom lid. For the top lid, you want a little semi circle that is flat and tapered at the corners.
I have put a eye crystal next to them, so you can get a size idea. Obviously you want 2 of each unless you are making a cyclops.
15) Put the bottom eyelid in place. Make sure that it is overlapping the crystal a little bit, as it is the job of the eyelids to hold the crystal in place. Press it firmly to the head.
16) Now for the top eyelid. Just like before, make sure that it overlaps the crystal a little bit and press it down firmly.
17) Smooth the joint of the top eyelid over with the head.
This is so it looks like part of the head rather than something that is attached. It looks far more natural.
Repeat this process with the bottom eyelid and then repeat on the other eye.
18) Add 2 little balls of the contrasting colour to the tip of the nose and press down firmly.
19) Using your pin tool, wiggle some nostril holes in the blue dots and then use it to make a mouth. I turn up the ends for a happy look.
Sometimes, I make 2 of the claws in white and place them under the top lip as fangs. Use your pin tool to make sure they are firmly attached.
20) The head goes to one side and we are back to the body.
Remember how you smoothed the eyelids to the head? Well we are doing the same thing for the shoulders.
In the picture, I have done the 2 on the right and not the left so you can see what a difference it makes.
21) It's time to put the head on the neck. Make sure you push it down firmly, so it bonds well to the neck.
If your neck is thin or long, you will need to put some florists wire down the neck. Leave some sticking out, so you can inpale the head on it.
22) Roll out a tiny sausage that is long enough to go around the neck.
23) Put the sausage around the neck in the join between the head and the neck.
24) Smooth the sausage intothe joint to strengthen the joint and make it look natural.
Position the head in a pose you like.
25) Make 2 thin sausages out of the contrasting colour, then press them flat. Then while holding one end, you twist the other.
Do this with each ofthe 2 sausages, then place them above the eyelid, going in a slight curve down the back of the head.
Then put it to one side.
26) Cut 2 L's of florist wire. I hold it against the dragon and then I can see how big to make them.
You're going to need a few centimetres of wire out the bottom of the wings to stick into the dragon's back.
27) Roll out 2 balls. On each of the balls, push one of the wire Ls through the middle until the ball is in the corner.
Roll and pull the clay out, like you did with the tail. One side of the L is thicker and it stops half way and the other is thinner, covering the whole wire completely. Make sure you cover and smooth out the tip.
Use your fingers to pinch out a little hook at the corners.
28) Roll out 2 balls of the contrasting colour. Using your hands to flatten the balls into disks, the thickness you want the wing.
You then press the sides of the disk against your board, to turn it into a triangle.
Then using any of the tools handles ect, put in 3 dents along the long side and smooth out any creases this causes.
Then push the tangle into the L's.
29) Roll out some long very thin sausages in the mane colour.
Start them from the corner and bring them to the top of each of the dips in the edge.
Push them down firmly, to make sure they are attached.
17) Smooth the joint of the top eyelid over with the head.
This is so it looks like part of the head rather than something that is attached. It looks far more natural.
Repeat this process with the bottom eyelid and then repeat on the other eye.
18) Add 2 little balls of the contrasting colour to the tip of the nose and press down firmly.
19) Using your pin tool, wiggle some nostril holes in the blue dots and then use it to make a mouth. I turn up the ends for a happy look.
Sometimes, I make 2 of the claws in white and place them under the top lip as fangs. Use your pin tool to make sure they are firmly attached.
20) The head goes to one side and we are back to the body.
Remember how you smoothed the eyelids to the head? Well we are doing the same thing for the shoulders.
In the picture, I have done the 2 on the right and not the left so you can see what a difference it makes.
21) It's time to put the head on the neck. Make sure you push it down firmly, so it bonds well to the neck.
If your neck is thin or long, you will need to put some florists wire down the neck. Leave some sticking out, so you can inpale the head on it.
22) Roll out a tiny sausage that is long enough to go around the neck.
23) Put the sausage around the neck in the join between the head and the neck.
24) Smooth the sausage intothe joint to strengthen the joint and make it look natural.
Position the head in a pose you like.
25) Make 2 thin sausages out of the contrasting colour, then press them flat. Then while holding one end, you twist the other.
Do this with each ofthe 2 sausages, then place them above the eyelid, going in a slight curve down the back of the head.
Then put it to one side.
26) Cut 2 L's of florist wire. I hold it against the dragon and then I can see how big to make them.
You're going to need a few centimetres of wire out the bottom of the wings to stick into the dragon's back.
27) Roll out 2 balls. On each of the balls, push one of the wire Ls through the middle until the ball is in the corner.
Roll and pull the clay out, like you did with the tail. One side of the L is thicker and it stops half way and the other is thinner, covering the whole wire completely. Make sure you cover and smooth out the tip.
Use your fingers to pinch out a little hook at the corners.
28) Roll out 2 balls of the contrasting colour. Using your hands to flatten the balls into disks, the thickness you want the wing.
You then press the sides of the disk against your board, to turn it into a triangle.
Then using any of the tools handles ect, put in 3 dents along the long side and smooth out any creases this causes.
Then push the tangle into the L's.
29) Roll out some long very thin sausages in the mane colour.
Start them from the corner and bring them to the top of each of the dips in the edge.
Push them down firmly, to make sure they are attached.
30) Push the wire ends of the wings into the dragon'sback at an angle. I tend to do both wings at once, so they lay right.
Push until the side of the wings are securely attached to the back, making sure that the rest of the wing is laying right and not getting caught up in his leg.
Smooth down the join of the wing to the back and ad a polished pebble for a front horn if you wish.
All finished!
You can do verious embellishment's like spikes on the back and various head frills and horns. Play around and see what you like.
Baking
Follow the instructions on the packet.
I personally use the temperature needed for Fimo professional (110oc) but as it is a thicker piece, I bake it for an hour.
I generally cover the tray it is on in baking foil (as my husband don't like the smell of Fimo in the oven).
I would use a oven thermometer to make sure that your work is at the right temperature. Too low and it stays like soft clay inside, too hot and it will scorch.
You need to leave it in long enough to make sure that your creation gets to 110oc all the way through, as a soft core will cause cracking and even breakages. You can't bake for too long, as the clay is happy at that temperature.
You can give it a coat of varnish once it has cooled, but only certain varnishes. I will do a blog on that in the future.
Do show me your end results and let me know if you have any questions and tell me if you found this helpful.
Good luck and big hugs.
Labels:
crystals,
dragons,
Fimo,
for sale,
handmade,
modelling,
polymer clay,
tutorial,
walk through
Location:
Epsom, UK
Thursday, 15 September 2016
How I make my armatures
I have found that I can get metal coat hangers cheaper than I can get thick crafting wire, so I use this for anything that needs to be strong. I use florists wire for more delicate things like wings.
I use metal epoxy putty for all the joins. It is clean to work with (if you use gloves) and sets very quickly. Once set it is as strong as if you welded it.
I then use scrunched up tinfoil to fill any large spaces (like the body of a horse) and use masking tape to hold it in place.
Once I have finished, I cover it all in masking tape. This is because my clay will stick to masking tape, where it will slide on the smooth metal.
Also, trying to cover tinfoil in clay without the tape is a disaster! You wind up with loads of it poking through the clay, where it's not gripping. That was a really annoying day, learning this the hard way.
I would also like to mention that you need to check that you are making it in a pose that will hold well and look natural. I look online at pictures of the thing I am trying to make.
As a rule, if your armature falls over when you put it down, then so will your model. It is possible to change this by the weight of the clay, but not easily. It's far easier to get it right at this stage.
Location:
Epsom, UK
Subscribe to:
Posts (Atom)