If you decided that you liked to mess around with polymer clay, you might consider methods to learn more about it. While there are a range of books out there (your local library will have some), online tutorials, websites, if you encounter any problems then you are left asking around on forums.
So, it is worth paying for lessons. There are some who run online courses and others who teach in person. I am planning to become the latter.
My main reason for wanting to become a teacher, is actually to get to know new people. I know that there are a lot of teaching roles where you are not allowed to make friends with the students, but since this is a adult teaching adults and there is not any big power difference, then this is fine.
Having a lot of long term health problems prevent me from getting out and about, so I don't get to meet people that way. Since I work for myself from home, that takes away all the people who we meet through work. I am not Billy no mates by any means, but I think I really need to work at that part of my life.
I have looked around the UK and found that there are quite a few teachers out there, but none of them are in Surrey and there is no clay groups either. The teachers I did find, teach either jewellery and bead making, canning, flower making and one or two who teach various model making or sculpting. I plan to be a little different.
I am planning to run classes for 8 people at a time. They will pay for one lesson a few hours long, rather than a long course, but I also plan to run a much larger clay group, which I will explain more about at the end.
Lessons
I will start the lessons the same, with showing how to use the clay and tools properly.
The main body of the lesson will have several options. I am making worksheets that are the step by step process to make different items. Each step will have a photo and a explanation. The help sheets are divided into two types;
1) Design
How to make a type of pattern or effect with the clay.
2) Project
How to make a home decor item from clay, either patternedor plain. These will be things like bud vases, little boxes, tea lights, decorative bowls etc.
I know that I will need to have all 8 students working from the same 2 cards, but I am not sure how I am going to do this. These are the options, let me know which one you think is best;
1) The democratic option
Once 8 people have signed up, allow them to vote between them.
The benefits to this is that I can run a class as soon as I have 8 people. The down side is if someone want to do one in particular and it doesn't get voted for.
2) Advertise them as different courses
I would permanently pair the designs and the projects and then advertise each option as individuals classes. When I get 8 people I run the course.
The benefit to this, is that everyone gets what they want. The downside is that it will take a lot longer to get 8 people who want to do that specific course, so it would make organising the dates for the class very difficult.
3) Cycle the lessons
This is my least favourite option. Like before, I pair off the designs and projects, I then run each pair one after the other.
The reason why this is my least favourite option, is that I really am not sure how to deal with it if I have too few people who sign up for the class.
So....
I will need at least 6 people attending in order for me to make it so that I make any money for my time.
I have already bought all the tools and equipment needed to teach 8 people, so that I know that I will definitely be doing this as soon as I am well enough.
Clay group
As I said, there is no clay groups going on locally, the nearest is London.
One of the first places I checked was with The British Polymer Clay Guild. Since they had nothing in Surrey, I have decided that I am going to do it myself.
A lot of the different guild groups organise tutors for each of their meetings and charge £10+ for members to attend the meeting/ lesson, but I as usual want to do it different.
My plan is that everyone comes along and works on their own thing in a social environment. I will keep a loose eye on things and help anyone who wants some help, but I will not be a tutor.
I will be happy to supply the clay (which I will sell to people at the price I got it. They will get to use my tools on a "you damage any, you replace it" basis, but it will be encouraged for them to bring their own.
Doing it this way, all people would need to pay, is enough to cover the room between them. If I get a church hall or scout hut, then this should be very cheap.
This really would be me on my own time, organising a social event for like minded people to have fun claying around.

I make home décor items from Polymer clay and sell them on Etsy. This blog is to let you get to know me, learn how I make my creations and keep up with everything I am doing with my business. Please feel free to comment, send me a message or share any of my work with your friends.
Showing posts with label handmade. Show all posts
Showing posts with label handmade. Show all posts
Sunday, 16 October 2016
Monday, 3 October 2016
Charms. My problem with miniature sculpting.
Anyone who has been to my online Etsy shop, know that I have a largerange of charms available;
Gina pigs, moles, dragons,cats, badgers, swans, duck, butterflys, stegosaurus, dogs, lizards, penguins, hedgehogs, crocodiles, dolphins, turtles, owls, rabbits, bears, bees, fish, sheep, monkeys, horses, mice, ladybirds, pigs, squirrel, elephant, starfish and seahorse!

"Looks to me Carly, like you don't have any problems with miniatures, so what's with the title?"
As I have mentioned a lot on previous posts, I have have Chronic fatigue syndrome and Fibro myalgia. This means that my arms and hands are always in pain at varying degrees and they are often shaking and weak.
Others may just take days like this off and I did, but after 14 years off ill, the plan is to find ways to do a little most days (around 10 hours a week in all, if I can). It took a year of trying other jobs and I have been a professional sculptor for a year. So 16 years disabled.
I work from my bed, but I often have to use pillows to support my arms while I work laying flat. Luckily, my bed is 2 single mattresses pushed together. This is far bigger than a king size double bed. I often have all my Husband's and my pillows and duvet almost like a cloth outline of support.
Even with all this, I find that there are only some things that I can manage. I am often having to move misplaced components and fixingdamage caused by my shaking.
The other issue that I have that really affects my abilities to do miniature work, is the fact my left eye wanders off. The tendon that holds your iris where you want it, is very loose. This means that it often goes to the left hand corner.
I have had this all my life. My brain compensates by using my right eye, but this causes me a lot of depth perception issues. Dyslexia (also got this) has hand eye coordination issues and the brain fog of the CFS, all mix and cause an obstacle for my brain in giving me accurate sensory information.
Luckily for me, clay is extremely forgiving. While raw, it is so easy to change. You can pull it all over the place, constantly fiddling. If it gets too warm, then it can go sticky, but you either blot it on some paper or just whack it in the fridge for a few minutes (I do the latter).
Once the clay has been baked, it is actually really easy to carve. You can actually cut it with a craft knife. You can also sand it to remove blemishes.
I see all of this as a obstacle rather than a barrier, but I have to be realistic. This is why I will not promise to make anything smaller than 3cm.
I know that there are many elements of the items I have made for the shop, that are smaller than 3cm.
The difference is that if I agree that I will make things that small on commission, then if it turns out that it is one of the many things that I can't make in miniature, then I have broken my promise. I want to be trustworthy and customer focused, so I have to make this rule.
There are tons of amazing artists who create incredible miniatures, so the market will not miss me.
Sunday, 2 October 2016
Why I work free hand instead of using moulds
Polymer clay work is basically divided into two. Things made free hand and those who use silicone moulds. These clay models are made by pushing the clay into a mould. You can knock them out in seconds, so you can charge pennys for them.
Some people make a model freehand and then create their own moulds, so that they can then easily reproduce the original.
I am not saying that using moulds is not skillful, legitimate clay work, but I felt that I needed to make a hard line decision on this.
I decided that I would not use any moulds, even if they are just to get the base shape and you then decorate it with the details freehand. I felt it would confuse people if I kind of used them. Transparency on this is really important to me.
I do break this on 2 occasions;
1) Sutton slice
This is when you take a rubber stamp (that people usually use with ink) and fill the indented part with clay. You use a blade to make sure that the raised bits are not covered by any clay. You then stamp it where you want.

 Both the white of the flowers on the first picture and the gold of the celtic design on the second picture where done using this.
My mum had a big collection of rubber stamps that she used for card making, they where put in storage when she died a few years ago. My father has promised to get them to me at some point (hopefully in the next few years).
2) Moulded letters
I have a mould of each letter of the alphabet in capitals and I plan to get more in a few different fonts. They are just far sharper and uniform than I can make freehand.

I will never use them on any model or on things that the models are on, if it's made from Fimo. I do say if any of the elements of a piece are not made by me, these include ceramic teapots, glass vases, glass bud vases, glass jars, glass bottles and glass carafes so far.
If I am using a non Fimo element, I will try to make sure that they are very plain. I want them to add an element of practicality to my artwork, as I want everything to be of more use than them being pretty. The clay will always be the star of the show. I see the other materials like a painter would a canvas. It facilitates the art.
I do also make purely decorative bits like my Christmas decorations and status, but I wanted to be able to offer both.
I accept that it will take many years before I have the perfection that a mould offers. You can guarantee before you pick up your clay, what the measurements will be exactly. You can guarantee a exact reproduction every time. But you don't develop. It really narrows your creativity.
I have grown to love the imperfections of freehand work. I think it makes each piece far more valuable, each piece has a bit of my heart and sole that I would never feel about moulded creations.
Some people make a model freehand and then create their own moulds, so that they can then easily reproduce the original.
I am not saying that using moulds is not skillful, legitimate clay work, but I felt that I needed to make a hard line decision on this.
I decided that I would not use any moulds, even if they are just to get the base shape and you then decorate it with the details freehand. I felt it would confuse people if I kind of used them. Transparency on this is really important to me.
I do break this on 2 occasions;
1) Sutton slice
This is when you take a rubber stamp (that people usually use with ink) and fill the indented part with clay. You use a blade to make sure that the raised bits are not covered by any clay. You then stamp it where you want.


My mum had a big collection of rubber stamps that she used for card making, they where put in storage when she died a few years ago. My father has promised to get them to me at some point (hopefully in the next few years).
2) Moulded letters
I have a mould of each letter of the alphabet in capitals and I plan to get more in a few different fonts. They are just far sharper and uniform than I can make freehand.

I will never use them on any model or on things that the models are on, if it's made from Fimo. I do say if any of the elements of a piece are not made by me, these include ceramic teapots, glass vases, glass bud vases, glass jars, glass bottles and glass carafes so far.
If I am using a non Fimo element, I will try to make sure that they are very plain. I want them to add an element of practicality to my artwork, as I want everything to be of more use than them being pretty. The clay will always be the star of the show. I see the other materials like a painter would a canvas. It facilitates the art.
I do also make purely decorative bits like my Christmas decorations and status, but I wanted to be able to offer both.
I accept that it will take many years before I have the perfection that a mould offers. You can guarantee before you pick up your clay, what the measurements will be exactly. You can guarantee a exact reproduction every time. But you don't develop. It really narrows your creativity.
I have grown to love the imperfections of freehand work. I think it makes each piece far more valuable, each piece has a bit of my heart and sole that I would never feel about moulded creations.
Friday, 30 September 2016
My diversity penguins

One of the first characters I made was this little cartoon penguin. It started life as a charm, that shortly after joined my Christmas decorations range.

I love this little fellow so much, that when I started to make boxes, I really wanted to do one of my little penguin friend.

Shortly after making my penguin love box, we where fortunate enough to witness a wonderful landmark in the evolution of mankind; gay civil partnerships became legal.
I was so happy for humanity, I wanted to celebrate the occasion. So I decided to make 4 little statues and I felt that my penguin was perfect for the job.


I made 2 gay penguins; 2 penguins kissing, one wearing a bow tie and the other wearing a scarf in the gay flag colours. There is a little gay pride flag on the base.
Then it was the lady's turn.


One of each of these statues have found their forever homes. After them being avaliable in my shop for a few months, I was contacted by a lovely lady wanting a commission made.
She said that her best friend (Jacob) was a nurse who was also gay and she wanted the statue turned into a box for his 21st birthday.


I was particularly proud of the name badge.
Several months after this, I was commissioned to make a box for a disabled people's help center called "The hub".
As soon as I decided to make this donation, I knew exactly what I wanted to make and I felt that it really had to be my penguin again.


They were really pleased with it and it has lived in the window of the premises on the main high street in Epsom, Surrey ever since.
I have ventured into more realistic penguins, but I will always love my original cartoon penguin.

My penguin has donned his white coat again! This time it's for a name plaque that I have made for my GP.

Wednesday, 28 September 2016
Copywrite. Why I can't make some things even if I really want to
The definition of copyright;
"the exclusive and assignable legal right, given to the originator for a fixed number of years, to print, publish, perform, film, or record literary, artistic, or musical material."
This is in the laws of basically every country. If you discover that someone copying your work, you have the right to legally force them to stop and you may sue them.
It will go to court and if a judge finds that it is close enough to breach the copyright, then they will issue you a CCJ.
This means that you get it on your credit record and that becomes absolutely pants. You will have to pay a large fine (anywhere from thousands to millions), your court costs and the court costs of the people suing you.
Any insurance that you have, will not cover you for this because you broke the law. So, it can ruin lives.
Without naming any names, there are a lot of companies that have whole departments where looking for people who have infringed their copywrite. They have gone after fan art, very small businesses and even people who reviewed their products.
If you are making any money from it in any way, you need the written consent of the owner or they can sue. No exceptions.
Most companies will want payment for this consent, if they decide to entertain the idea. They can say no, with no reasons necessary.
I have terrible luck. I bunked school once and was caught by a member of staff who only came in to the school once a year to do dyslexia assessments. I have a hundred similar stories of me trying to do something naughty and getting caught. I never get away with it. NEVER!
I assure you all that I would truly love to make "Game of thrones" pieces, or Disney, Nintendo, Nicalodian, Saga, Waner brothers etc. I just can't afford to.
Yes, I know that a lot of other people do this and you can find tones of non official merchandise and they have sold for years with no problems. I think they must have got my portion of luck.
On the positive side, this allows me to focus on developing my own style. My art can come from my creativity and imagination. When you copy, you don't grow.
Over the last year, you can see my progress in my work. I have developed so much as a sculptor and my biggest hope for my life is to be able to keep my business going, so that I can Continue this journey.
Finishing touch. Why I use varnish
Baked Fimo is very tough, it is water proof and tougher than most varnishes. I have often heard of people's creations which after many years, have had the varnish crack and flake off and the clay itself is as good as the day it was baked. So, why bother?
If I use mica powder, that needs sealing in, or the surface layer rubs off. But what about non micaed pieces? Baked clay is very matt. It is so much so, that you find it hard to see small details in a pattern and the colours are dingy.
 This is a piece I have micaed. The vine inside of the circle has been varnished, but the rest has not. The flower in the circle has not been varnished either.
 Doesn't this just perfectlyshow the difference? It just makes all the colours pop!
You can achieve this without varnishes, through a series of sanding and buffing. This really does look amazing and I would love to do this, but it is not an option for me. I suffer from Fibro myalgia, the pain it causes in my arms is significant at the best of times.
You can't just use any old varnish, it has to be a polyurethane. Some varnishes reacts with the chemicals in the clay and turns it cloudy and yellowish over time. Worse than this, some react and after a few months of being fine, it goes sticky. Not just slightly tacky, proper sticky.
Although you only have one group of varnishes ( other than resins, wich I have no experience of) it is by no means a small group. So which one to choose?
Most people start offby getting Fimo'sown varnish. It is a tiny jar of watery varnish, that costs a lot and is not that shiny. Thoroughly underwhelmed, the serch is then on.
I found a lot of really good advice (like thebluebottle.com) but they mostly talk about products you can only get in America. This is no good for me in the UK, so I tried a few different ones out.
Some seemed to take days to dry, where lacklustre, where not as strong as the clay (chipped) or did not cope with the flexibility of the clay (it is in the PVC family) so it cracked or flaked.
Then, after a few months I finally found it. The one! The quest was finally at a end, I banked the experience points, looted the dead and went back to town to get a new quest.... wait, wrong hobby. That's D&D 😄
LADIES AND GENTLEMEN, I GIVE YOU THE WINNER 🎆🎉🎇🎊

Ronseal ultra tough hard glaze, clear polyurethane gloss varnish.
Wile I love this varnish, I do feel that I need to point out its more negative elements. I would say using the word bad here, would really be over the top.
1) drying time
It takes a few hours to dry. I would say that it's around 4 hours, but I honestly have not timed it.
2) colour
It's not clear, it's amber coloured (does what it says on the tin, my arse!). It does dry almost clear, but if you put more than a very thin coat onto something white, it can suffer from jaundice.
I advice you practice applying a very thin coat, I have got it down to a fag paper. It does look far better with a decently thick coat and you can do this on most things.
3) quantity
comes in big tins. You want to pour some into a airtight container, I use a jam jar. This is important for 2 reasons;
A) If it gets knocked over, you would much rather be cleaning up half a jar's worth, rather than a gallon.
B) all the time you have the lid off and the varnish is exposed to the air, it will set. You will notice that you soon need to use something pointy to break through the skin that forms over the liquid varnish.
So, if you used it direct from the tin, you will have to throw half of it away.
4) brush cleaning
Your going to need to use white spirit.
I use a plastic dish that I put in the sink and then pour a bit of white spirit in. You wash the brush in that, then move the dish out of the way and put some washing up liquid on the brush and rub in, then rinse. Then move the plastic pot back into the sink and repeat it all again.
Twice through usually does it. Just make sure that you get right into the base of the bristles.
5) fumie
I don't varnish in bead (like I do with the sculpting) this is because the 3 guinea pigs that live in a humongous cage in my room, would all get high on the fumes.
You will need a well ventilated area.
6) the obvious. It drips 😲
Put down a plastic black bin bag cut open, weighed down at the edges. Have kitchen roll to hand and a tray you don't mind varnish getting on (to put bits to dry). Wear latex gloves.
7) you can not bake it
While you can bake Fimo as many times as you want, you can no longer bake it once it has been varnished.
See not that bad and most of these would be true for all varnishes.
The only time I don't varnish a creation, is when the person buying it specificallyasks me not to.
I have not looked into mat varnish, as I really don't see the point.

If I use mica powder, that needs sealing in, or the surface layer rubs off. But what about non micaed pieces? Baked clay is very matt. It is so much so, that you find it hard to see small details in a pattern and the colours are dingy.


You can achieve this without varnishes, through a series of sanding and buffing. This really does look amazing and I would love to do this, but it is not an option for me. I suffer from Fibro myalgia, the pain it causes in my arms is significant at the best of times.
You can't just use any old varnish, it has to be a polyurethane. Some varnishes reacts with the chemicals in the clay and turns it cloudy and yellowish over time. Worse than this, some react and after a few months of being fine, it goes sticky. Not just slightly tacky, proper sticky.
Although you only have one group of varnishes ( other than resins, wich I have no experience of) it is by no means a small group. So which one to choose?
Most people start offby getting Fimo'sown varnish. It is a tiny jar of watery varnish, that costs a lot and is not that shiny. Thoroughly underwhelmed, the serch is then on.
I found a lot of really good advice (like thebluebottle.com) but they mostly talk about products you can only get in America. This is no good for me in the UK, so I tried a few different ones out.
Some seemed to take days to dry, where lacklustre, where not as strong as the clay (chipped) or did not cope with the flexibility of the clay (it is in the PVC family) so it cracked or flaked.
Then, after a few months I finally found it. The one! The quest was finally at a end, I banked the experience points, looted the dead and went back to town to get a new quest.... wait, wrong hobby. That's D&D 😄
LADIES AND GENTLEMEN, I GIVE YOU THE WINNER 🎆🎉🎇🎊

Ronseal ultra tough hard glaze, clear polyurethane gloss varnish.
Wile I love this varnish, I do feel that I need to point out its more negative elements. I would say using the word bad here, would really be over the top.
1) drying time
It takes a few hours to dry. I would say that it's around 4 hours, but I honestly have not timed it.
2) colour
It's not clear, it's amber coloured (does what it says on the tin, my arse!). It does dry almost clear, but if you put more than a very thin coat onto something white, it can suffer from jaundice.
I advice you practice applying a very thin coat, I have got it down to a fag paper. It does look far better with a decently thick coat and you can do this on most things.
3) quantity
comes in big tins. You want to pour some into a airtight container, I use a jam jar. This is important for 2 reasons;
A) If it gets knocked over, you would much rather be cleaning up half a jar's worth, rather than a gallon.
B) all the time you have the lid off and the varnish is exposed to the air, it will set. You will notice that you soon need to use something pointy to break through the skin that forms over the liquid varnish.
So, if you used it direct from the tin, you will have to throw half of it away.
4) brush cleaning
Your going to need to use white spirit.
I use a plastic dish that I put in the sink and then pour a bit of white spirit in. You wash the brush in that, then move the dish out of the way and put some washing up liquid on the brush and rub in, then rinse. Then move the plastic pot back into the sink and repeat it all again.
Twice through usually does it. Just make sure that you get right into the base of the bristles.
5) fumie
I don't varnish in bead (like I do with the sculpting) this is because the 3 guinea pigs that live in a humongous cage in my room, would all get high on the fumes.
You will need a well ventilated area.
6) the obvious. It drips 😲
Put down a plastic black bin bag cut open, weighed down at the edges. Have kitchen roll to hand and a tray you don't mind varnish getting on (to put bits to dry). Wear latex gloves.
7) you can not bake it
While you can bake Fimo as many times as you want, you can no longer bake it once it has been varnished.
See not that bad and most of these would be true for all varnishes.
The only time I don't varnish a creation, is when the person buying it specificallyasks me not to.
I have not looked into mat varnish, as I really don't see the point.

Tuesday, 27 September 2016
Lots of cat cuddles
As I have mentioned before, I look through animal pictures on Google to get most of my inspiration.
A few months into the business, I came across my most used picture. I was looking under the search term "cute animals" and amongst them was this picture of a really cute black and white pair of cats cuddling. I will share the link rather than the picture as I don't want to infringe anyone'scopywrite.
http://www.redbarninc.com/blog/wp-content/uploads/2015/11/black-cats-cuddle-cute-heart-Favim.com-418491.jpg
Well you see what I mean, it screams "you must put me on lots of boxes! I am definitely the cutest protrail of cats you will ever find ".
With an argument like that, how could I refuse?
At verious points, I have made my version of this. I have also done it with different types of cats. Mabe one day I will do it with the wild cats too.


 Some have found their forever homes and some are waiting hopefullin my shop, but whatever happens they are never alone.
A few months into the business, I came across my most used picture. I was looking under the search term "cute animals" and amongst them was this picture of a really cute black and white pair of cats cuddling. I will share the link rather than the picture as I don't want to infringe anyone'scopywrite.
http://www.redbarninc.com/blog/wp-content/uploads/2015/11/black-cats-cuddle-cute-heart-Favim.com-418491.jpg
With an argument like that, how could I refuse?
At verious points, I have made my version of this. I have also done it with different types of cats. Mabe one day I will do it with the wild cats too.


As a identical twin, I dislike my own company. So, spending forever in a loving cuddle sounds great to me.
I also volunteeras a cat behaviouralist (I have studied feline behaviour and psychology), so these boxes are probably the closest to my heart.
I think I will be making variations for the rest of my career. I will never make a mould though, I love freehand sculpting too much.
Sunday, 25 September 2016
My dragon's first ever cousin and I could not be more proud!
As all who follow my blog know, yesterday I posted my first ever tutorial (other than the page showing my swerly parren). I posted it on various polymer clay groups, fantasy groups and dragon groups, only really expecting a couple of likes.
This morning however, I saw that someone hadactually commented 😲
It was a lovely woman called Jamie (a complete stranger). She said that she could not sleep last night, so she decided to follow my tutorial with some scrap clay.
She had never made a dragon before and had found that when other people had posted illiterated tutorials, they where difficult to follow, but she didn't find that to be the case with mine.

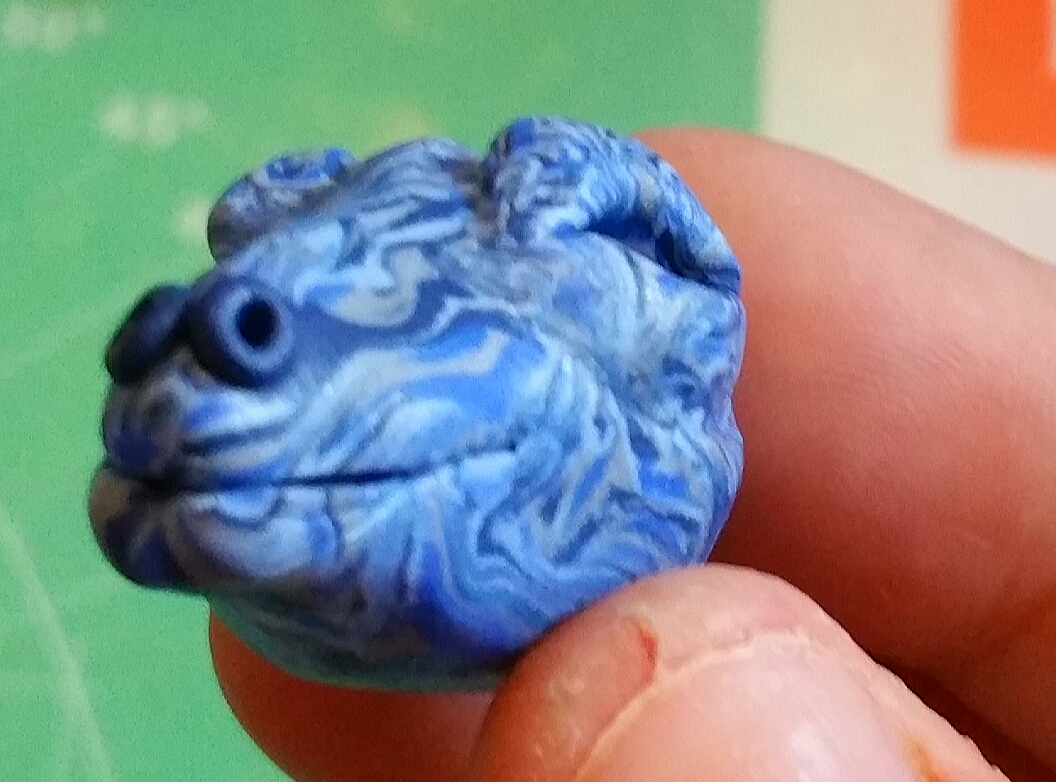
Here he is! It's not the greatest photo, but it's good enough to see that it's a truly fabulous little fellow, especially since his mum was tired and doing this for the first time. I assure you that he is far superior to my first.
I asked her if there was any part of the tutorial that she thought I needed to change in any way and she said no.
I was so happy that I actually cried a little and I am not a crying kind of girl! One of my big dreams/ ambitions, is to become a polymer clay tutor. There are a fair few out there, but most teach you how to make jewellery, beads, replica food and model babies and canes.
I want to teach model making and home decor items such as my boxes and bowels. I am too ill at the moment to do this, but I am slowly working on writing up some lessons and handouts.
I have even got (through much scrimping and saving) all the kit required for 8 people plus me. As soon as I stop shaking (it's been happening for over a week and is really annoying, I am having to adapt my clay techniques to cope with it) I will be filming my first YouTube tutorial.
So, unbeknown to the lovely Jamie, when she decided to combat the boredom of insomnia. She had actually validated all of my dreams and hard (usually painful) work. I'm not delusional, I can actually teach 🎆😆🎉
This morning however, I saw that someone hadactually commented 😲
It was a lovely woman called Jamie (a complete stranger). She said that she could not sleep last night, so she decided to follow my tutorial with some scrap clay.
She had never made a dragon before and had found that when other people had posted illiterated tutorials, they where difficult to follow, but she didn't find that to be the case with mine.

Here he is! It's not the greatest photo, but it's good enough to see that it's a truly fabulous little fellow, especially since his mum was tired and doing this for the first time. I assure you that he is far superior to my first.
I asked her if there was any part of the tutorial that she thought I needed to change in any way and she said no.
I was so happy that I actually cried a little and I am not a crying kind of girl! One of my big dreams/ ambitions, is to become a polymer clay tutor. There are a fair few out there, but most teach you how to make jewellery, beads, replica food and model babies and canes.
I want to teach model making and home decor items such as my boxes and bowels. I am too ill at the moment to do this, but I am slowly working on writing up some lessons and handouts.
I have even got (through much scrimping and saving) all the kit required for 8 people plus me. As soon as I stop shaking (it's been happening for over a week and is really annoying, I am having to adapt my clay techniques to cope with it) I will be filming my first YouTube tutorial.
So, unbeknown to the lovely Jamie, when she decided to combat the boredom of insomnia. She had actually validated all of my dreams and hard (usually painful) work. I'm not delusional, I can actually teach 🎆😆🎉
Saturday, 24 September 2016
How I make my dragons in 30 steps. Fimo / Polymer clay tutorial

Today I am going to show you how to make this lovely blue dragon. I have used my swerly clay pattern that I show you how to achieve here How to make swerly patterned clay
You will need:
- 2 different coloured clay (Fimo/polymer clay)
- 2 crystal beads for eyes and any crystals you are going to have it hold or mounted in its head.
- Some florists wire and something to cut it
- A pin or pin tool
- A rounded tool for smoothing and making the eye socket.
Method

1) Roll out a ball of clay, making sure that you have it smooth. Then, one Side you roll between your fingers and pull out into the tail. Using the same technique, pull out a thicker and stumpyer bit for the neck as shown in the above picture.

2) Putting the body to one side, we are going to make the legs. The top 2 are the arms and they are in the position to hold something.
Make sure you start out with 4 smooth balls the same size. Then you use the same technique as with the neck and tail, to pull the clay out into a long cone shape. You then manipulate it into the right shapes as pictured.

3) Very easy. Get the body and press it firmly onto it's base. Remember, the base needs to be able to go though an oven baking without melting.
Pinch along the back to create a spine.

4) Using your contrasting colour, you are going to roll out 12 tiny claws, like in the pipicture above.

5) Push the back legs onto the body and get the feet into a position you like, then make sure they are secure.
Then add 3 claws onto each feet.

6) If you are planning on having your dragon hold anything, then add this to the front and push it against the chest to start to secure it in place.

7) Add the front arms. Make sure you press them to the body, so they are firmly attached. You then position the arms and paws where you want. Make sure that they are firmly stuck to the base and the crystal, as you want the crystal to be very secure.


9) It's time for the tail to get some TLC. Position it how you like (I often bring it round the back legs ), remember that if you have it lifted off the ground, it is far more likely to break while baking.
I advise you insert an extra bit of florists wire to strengthen it. Don't forget to cover up and smooth off the resulting hole in the tip.
I decided to add a spiral in the contrast colour. Make a small sausage and press it flat, then twist it with your fingers.

10) Put the body to one side as we are going to make it's head.
Roll out a smooth ball, then roll on side of the ball to make a kind of pear shape (like in the picture).

11) Using a ball tool, uo make eye sockets on both sides.
Remember that predatorshave their eyes to the front and prey have their eyes to the sides.

12) If you are using crystals for eyes, place a bit of baking foil in each of the backs of the eye sockets (shiny side out) and smooth it in place with the ball tool.
If you are using a ball of clay or something not reflective, don't bother with this. It will make your crystals sparkle.

I like to use coloured Swarovski crystals.

13) Add your eyes to each eye socket.

14 ) Putting the head to one side, we are going to make eyelids.
You want a small sausage tapered at both ends, for the bottom lid. For the top lid, you want a little semi circle that is flat and tapered at the corners.
I have put a eye crystal next to them, so you can get a size idea. Obviously you want 2 of each unless you are making a cyclops.

15) Put the bottom eyelid in place. Make sure that it is overlapping the crystal a little bit, as it is the job of the eyelids to hold the crystal in place. Press it firmly to the head.
 16) Now for the top eyelid. Just like before, make sure that it overlaps the crystal a little bit and press it down firmly.
 17) Smooth the joint of the top eyelid over with the head.
This is so it looks like part of the head rather than something that is attached. It looks far more natural.
Repeat this process with the bottom eyelid and then repeat on the other eye.
 18) Add 2 little balls of the contrasting colour to the tip of the nose and press down firmly.
 19) Using your pin tool, wiggle some nostril holes in the blue dots and then use it to make a mouth. I turn up the ends for a happy look.
Sometimes, I make 2 of the claws in white and place them under the top lip as fangs. Use your pin tool to make sure they are firmly attached.
 20) The head goes to one side and we are back to the body.
Remember how you smoothed the eyelids to the head? Well we are doing the same thing for the shoulders.
In the picture, I have done the 2 on the right and not the left so you can see what a difference it makes.
 21) It's time to put the head on the neck. Make sure you push it down firmly, so it bonds well to the neck.
If your neck is thin or long, you will need to put some florists wire down the neck. Leave some sticking out, so you can inpale the head on it.
 22) Roll out a tiny sausage that is long enough to go around the neck.
 23) Put the sausage around the neck in the join between the head and the neck.
 24) Smooth the sausage intothe joint to strengthen the joint and make it look natural.
Position the head in a pose you like.
 25) Make 2 thin sausages out of the contrasting colour, then press them flat. Then while holding one end, you twist the other.
Do this with each ofthe 2 sausages, then place them above the eyelid, going in a slight curve down the back of the head.
Then put it to one side.
 26) Cut 2 L's of florist wire. I hold it against the dragon and then I can see how big to make them.
You're going to need a few centimetres of wire out the bottom of the wings to stick into the dragon's back.
 27) Roll out 2 balls. On each of the balls, push one of the wire Ls through the middle until the ball is in the corner.
Roll and pull the clay out, like you did with the tail. One side of the L is thicker and it stops half way and the other is thinner, covering the whole wire completely. Make sure you cover and smooth out the tip.
Use your fingers to pinch out a little hook at the corners.

28) Roll out 2 balls of the contrasting colour. Using your hands to flatten the balls into disks, the thickness you want the wing.
You then press the sides of the disk against your board, to turn it into a triangle.
Then using any of the tools handles ect, put in 3 dents along the long side and smooth out any creases this causes.
Then push the tangle into the L's.
 29) Roll out some long very thin sausages in the mane colour.
Start them from the corner and bring them to the top of each of the dips in the edge.
Push them down firmly, to make sure they are attached.


This is so it looks like part of the head rather than something that is attached. It looks far more natural.
Repeat this process with the bottom eyelid and then repeat on the other eye.

Sometimes, I make 2 of the claws in white and place them under the top lip as fangs. Use your pin tool to make sure they are firmly attached.

Remember how you smoothed the eyelids to the head? Well we are doing the same thing for the shoulders.
In the picture, I have done the 2 on the right and not the left so you can see what a difference it makes.

If your neck is thin or long, you will need to put some florists wire down the neck. Leave some sticking out, so you can inpale the head on it.


Position the head in a pose you like.

Do this with each ofthe 2 sausages, then place them above the eyelid, going in a slight curve down the back of the head.
Then put it to one side.

You're going to need a few centimetres of wire out the bottom of the wings to stick into the dragon's back.

Roll and pull the clay out, like you did with the tail. One side of the L is thicker and it stops half way and the other is thinner, covering the whole wire completely. Make sure you cover and smooth out the tip.
Use your fingers to pinch out a little hook at the corners.

28) Roll out 2 balls of the contrasting colour. Using your hands to flatten the balls into disks, the thickness you want the wing.
You then press the sides of the disk against your board, to turn it into a triangle.
Then using any of the tools handles ect, put in 3 dents along the long side and smooth out any creases this causes.
Then push the tangle into the L's.

Start them from the corner and bring them to the top of each of the dips in the edge.
Push them down firmly, to make sure they are attached.

30) Push the wire ends of the wings into the dragon'sback at an angle. I tend to do both wings at once, so they lay right.
Push until the side of the wings are securely attached to the back, making sure that the rest of the wing is laying right and not getting caught up in his leg.
Smooth down the join of the wing to the back and ad a polished pebble for a front horn if you wish.


All finished!
You can do verious embellishment's like spikes on the back and various head frills and horns. Play around and see what you like.
Baking
Follow the instructions on the packet.
I personally use the temperature needed for Fimo professional (110oc) but as it is a thicker piece, I bake it for an hour.
I generally cover the tray it is on in baking foil (as my husband don't like the smell of Fimo in the oven).
I would use a oven thermometer to make sure that your work is at the right temperature. Too low and it stays like soft clay inside, too hot and it will scorch.
You need to leave it in long enough to make sure that your creation gets to 110oc all the way through, as a soft core will cause cracking and even breakages. You can't bake for too long, as the clay is happy at that temperature.
You can give it a coat of varnish once it has cooled, but only certain varnishes. I will do a blog on that in the future.
Do show me your end results and let me know if you have any questions and tell me if you found this helpful.
Good luck and big hugs.
Subscribe to:
Posts (Atom)